Thursday, February 28, 2013

Funny the Things that Make me Happy....

Warning:  There is Potty Talk in this blog post.


So, as I get older, sometimes it's the simple things in life that make me smile...

Like, say... a clean toilet.


Here's my problem.

We moved into our house with a well two years ago and were warned that some wells can dredge up some pretty gross-looking, though potable, water.

The first week, the water was great... clear, clean.

Then week two hit.... every sink, every toilet, every shower and tub spewed brown water.  Ick.  Well, it took another week or two of calling/setting-up-appointments/ordering, but we eventually got a water softener/filter system and the water is now clear again.

Unfortunately in those couple of weeks, this is what happened to EVERY. SINGLE. TOILET.


I was so embarrassed to have friends over... I never wanted them to use our bathrooms.

This toilet is "clean".  Yes, it's been scrubbed and cleaned with cleaner and a brush.  You could never tell, though.  Those streaks are the brown "rusty" water marks from the first month of living in this house.

I thought we were destined for gross toilets till we could afford to replace them all.  Then my friend Courtney recommended the "pumice stone".  I assumed all pumice stones were for that hard calloused skin on your heels!

Nope... the Pumie Pumice Stone came to the rescue.

Here is the half-way point in our Master bath.  Shocking how easy it was to rid the toilets of those gross brown/orangey rings.  The stone wears down as you scrub... and slowly rounds at the top, so it's easier to get it where you need it.


I apologize for posting photos of TOILETS on the blog, but seriously I had to share this little tool.  It's awesome!  Granted, cleaning five toilets on Saturday was not my idea of a fun time... but the results just make me happy.  


Wednesday, February 27, 2013

Wasted closet (space) turned NOOK!

I love my house...so don't get me wrong when I say this....

I don't know what they were thinking when they designed these houses.  SO much wasted space!  Sometime I feel like there are walls where there shouldn't be...and no wall where there should.  Either way...nothing a handy husband can't fix! 

Okay, I am not going to lie.  My husband drives me crazy sometimes.  Not in a bad way...it's only because he CAN'T. SIT. STILL.  Don't get me wrong...he likes to relax, but if there is a project that needs finishing...the man is relentless.  Seriously. 

So needless to say, the project I am about to show you went fairly quickly considering the amount of time my husband is not home.

Here's what we did.  We had a coat closet straight ahead when you walked in from our garage into the "mudroom" {which really isn't much of a "room"...it's more of a "space"}.  Having two kids {maybe more in the future}, we needed to do something to better utilize this space.

We had a 9-cubby cubicle system under the window for almost a year, but honestly, I hated staring at it from the kitchen/family room.  It just made things look cluttered and messy.  Which I hate.  We also had tons of unused space above our "builder-grade-wire-rack" that was driving me nuts.  We have 9-foot ceilings, so about 2-3 feet of space wasn't being utilized!  A-N-N-O-Y-I-N-G.

I starting looking on Pinterest {yes, Pinterest AGAIN} for ideas for a "closet nook".  I came across a bunch that I really liked, so I just had to figure out a way to incorporate them all into one design that would work for OUR space.

Day 1: Husband forced me to clean out the closet--I stacked everything up in our dining room {which sat there for a while until I finally went through everything and donated what we didn't use/want anymore}.

Then, he started the demolition {probably his favorite part}...we had a great plan...and I even sketched a drawing...


HOWEVER, we ran into a little snafu.  Not a huge deal, but there was a pipe {to some sort of plumbing} in one of the walls that we were planning on taking out...so, we switched to "Plan B" and left the wall there and worked around it.

ANYWAY...I won't go into great detail {only because I have no idea how he measured everything and how he cut the wood}, but here is essentially what we he did.

-Built up lower "bench" base with 2x4's
-Created a bench {with cubbies} to sit on
-Built shelves up the side {where the wall with the pipe in it was}
-Created shelves on top for overhead storage
-Added wainscoting for a decorative finish
-Added hooks to hand coats/bags/purses/etc...
-Caulked the gaps and painted {a few coats} of semi-gloss white paint.

So here are some "BEFORE" and "AFTER" pictures.....it was actually easy to do and has made a HUGE {like monumental} difference in the way we use this space.


Saturday, February 23, 2013

Quick Spring Office Project

This morning, I had to run my son to Michael's to find mirrors.  He needs to make a periscope for science class by Tuesday.  (Not sure if he has known this for awhile and neglected to tell me till now or if the teacher just assigned this on Friday... in either case, someone is not taking into account the fact that we live 30 minutes out from any sort of craft store!!  So... impromptu trip to Michael's!  Remember, it wasn't my choice... someone HAD to go to the craft store.)

Anyway... I gave my husband the option to pick this particular Saturday morning errand... but he chose another one instead (taking daughter to Girl Scout Cookie booth...oh wait a minute, crafts vs. cookies... NOW I get it!)  

So, I can't be responsible for the fact that I had to walk into a craft store with no real budget for crafting.    Spending money at craft stores is an addiction of mine... it wasn't my fault!  I was forced in there!

I HAD to walk out of there with SOME kind of a project, right?  I mean, seriously... we're talking about ME now.

I was good... there were many, many things to buy, but I chose a simple little $4.20 vase.  

Isn't this owl just the cutest?  At 40% off, he was not a bad price, and I just love a deep orange.  Isn't it funny how tastes change as you grow up.  Thirty years ago, orange was #3 on my least-liked colors.... behind brown and black.  #4 was green.

Nowadays, my house is almost entirely browns, blacks,... and some orange (and some green).  LOL

Back to the owl vase... I needed to make it "useful" to justify the cost.  So, I decided to do what everyone knows about... making flower-pens.  I bought a bunch of yellow daisies, too ($2.40) and a roll of floral tape ($1.99).  I already had the pens.


I feel like everyone knows how to make these, but in case... here's how I do it.  I cut the flowers apart and trimmed the stems to be shorter than the pens (and with no little plastic pieces sticking off of them).


Then I begin using floral tape (about 15-18" pre-stretched). to wrap the flower onto the pen.  Just be sure to allow for space for the cap to go back onto the pen.

There you are... a little splash of color in my office nook.  Nice springy color... and that cute little floral bouquet is USEFUL... it offers a quick pen (and in this family, we are ALWAYS looking for pens!  Is that you too?)

I used a few other light green flowers I found at home to vary the bouquet a bit.  The total cost was under $10 since I already owned the pens and a few flowers.  Wouldn't this make the most adorable little gift for teachers or an Easter gift for family?  At least it's something no one will toss after the holiday and it can be used daily!  And the price is right while these vases are 40% off.

Michael's did have other colors of owl vases... green and maybe white?  I can't really remember... the orange one stood out to me.  This particular style worked well because of the price and because the vase is less than 5" tall.

So... maybe you'll have a son/daughter who needs some crazy piece for a science project that forces you to go to a craft store.  Here's one project you won't feel guilty about later.  :)


Friday, February 22, 2013

Foodsie Friday....Bruschetta/Balsamic Chicken

Don't know about you, but I am ALWAYS throwing away produce that has "gone bad"...it's such a waste!!  So apparently last time I went to Wegman's, I went a little crazy with the Roma Tomatoes.  I think I ended up buying 12 or something like that...what am I going to do with 12 Roma Tomatoes???
"Eat them, duh!"

I have a small pot on my windowsill above my kitchen sink where I am growing some Basil, Thyme, and WAS growing Cilantro {until I over-watered} and it wilted and died...ugh...

So....I wanted to make Bruschetta...which by the way is one of my favorite hors d'oeuvres...{and when I say favorite, it should translate into "I-can-eat-it-with-a-spoon"}.  But anyway...I wanted to make some bruschetta, but I also wanted to be able to make a meal out of it...for dinner.  My original thought was to slice the chicken breasts, then stuff it with the bruschetta...but that idea went out the window...the thought of "hot bruschetta" didn't really appeal to me.

So...I starting thinking of how I could incorporate chicken into the whole "bruschetta" thing...here's what I did:

Bruschetta:

8-10 Roma Tomatoes, diced
1-2 tablespoons minced garlic {I like a lot of garlic, so you may need to adjust to your taste}
15-20 leaves fresh basil, chopped
4-6 tablespoons balsamic vinegar
2-3 teaspoons sugar

Mix all ingredients together in a bowl and chill for at least 1 hour.

Chicken:

4 boneless, skinless chicken breasts
1 bottle of Zesty Italian Salad Dressing
1/2 cup of balsamic vinegar
2 tablespoons brown sugar

Combine all ingredients into gallon-size zip-lock bag and let the chicken marinate (I let it marinate for about 4 hours)

After done marinating, place in a oven-safe dish and bake at 350 degrees until cooked through.

Meanwhile, cook your favorite pasta {mine happens to be Angel Hair pasta}.  I also created a balsamic reduction to toss with the pasta {I didn't want to use regular tomato sauce because I thought with the bruschetta it would be too "tomato-ey"}.  Sooo...{and please forgive me, because I rarely measure anything...so these are just "guesstimates"}

Balsalmic Reduction:

In a saucepan, bring to boil about 1/2 to 3/4 cup balsalmic vinegar...once boiling, lower heat to a simmer...stir frequently until liquid becomes "thicker"...{notice...I did not say "thick"}

Once "thicker", remove from heat and add 1-2 teaspoons maple syrup {I used just regular old "Aunt Jemima"}.  Sounds weird, I know...just do it.

Toss your cooked pasta with your balsamic reduction.

Final step:

Place desired amount of pasta on plate, place cooked chicken on top of pasta, sprinkle with desired amount of shredded mozzarella cheese, layer with bruschetta, and then a little more cheese {because you can never have enough cheese}...and Viola!

Here is how it turned out!  {Btw, the hubby loved it!!  He ate 2 plates!!!}

 
Let me know how you like it if you try it!
 
Enjoy!!


Monday, February 18, 2013

"New" Dressers

So, I moved two dressers into my youngest son's bedroom last week.  They are small, but identical, a family hand-me-down set.

Although the dressers were nice, the wood just didn't go well in the room... and those drawer pulls needed a serious update.  One of them even lost the screws (how does that happen?  They should fall INSIDE the drawer, right?)

Anyway... I used a little wood filler to fix that scratch....

...then I went out and picked up a pretty blue paint and "Gripper" primer paint.  After two coats of primer and two coats of blue paint, I let dry for a couple of days and replaced the drawer pulls.  I love the brushed nickel cup pulls.  (bought at Amazon!)


Love the look of these!  What do you think?

Here is a shot of the dressers with the "new" shelves above.  I found both of these shelves at a local thrift store and painted them both brown.  I plan to cover up the star and moon so as to look a little less "nursery".  I also want to find some more shelving for another corner of the room so these can be just for sports trophies.  Until then, the shelves are a bit cluttered and un-finished, but they make an eight-year-old boy happy.


Wednesday, February 13, 2013

Will you be my (preschool) Valentine??

With Valentine's Day quickly approaching, and with being Taylor's pre-school "Room Mom", I feel the need to be "uber crafty" this Valentine's Day.

So, of course, I got on Pinterest and starting obsessively searching for the "prefect" (age appropriate) Valentine's Day goodies.  As you know, on Pinterest you can find a million-ba-zillion things, but there were two things in particular that stuck out to me that I thought were pretty cute. (and of course, I FORGOT to "pin" them!!  Ugh!)

The first one I saw were these little buckets filled with a V-Day version of "Crunch and Munch".  I thought this would be pretty easy (and cheap) to replicate...so the first thing I thought of was "the dollar spot at Target (Tar-jay)".  Lo and behold, right when I walk in, first thing my eyes meet are some lovely tin buckets...how perfect!?  I got the pink ones for the girls, and the blue ones for the boys.  I also found some "print-your-own" tags online at http://www.piggyinpolkadots.com/ (I went back to try to find them again but for some reason I couldn't...so I am kicking myself for not saving them to my computer!)...anyway, I printed them out and I am going to tie them to the bags of "crunch and munch".

I gathered up the rest of my supplies that I needed (cereal, pretzels, popcorn, and v-day M&M's) and headed to the checkout line...the lady probably thought I was a crazy-candy-feening-weirdo, but whatever...she didn't know what I had planned!!  Here are a few pictures I took "along the way"...


Also, here is the recipe for the "Munch"....

2 c. Rice Chex Cereal
2 c. Pretzel Sticks
2 c. White Popcorn (I used just plain "white" (buttered))
12 oz. bag of White Candy Melts
1 bag of Valentine's Day colored M&M's
 
-Mix all ingredients together (except M&M's)
-Melt candy melts and toss/coat the cereal, popcorn, and pretzels
-Spread over foil covered baking sheets and then sprinkle with the M&M's (if you add the M&M's with the other ingredients while you are "tossing", your M&M's will be covered in white candy coating)
-Let cool then break up into clumps.
 
 
Once this cooled, I broke them up into cellophane bags and twist tied them shut..then put them in the tins upside down (because it looked better that way). 
 
Here are the tags I used...the


The second one I found on Pinterest was this oh-so-cute idea...let's call this one "I love you to PIECES!"

While I was at Target (in the candy aisle), I was searching and searching for the small bags ("bite-size") of Reese's Pieces.  Could.  Not.  Find.  Them.  For.  The.  Life.  Of.  Me.  Seriously, where were they!?  So I had to resort to a size just a wee bit bigger...THESE! 


My plan was to give each child their own box...but then I thought it would be too much candy, so I opened the boxes and divided them up into smaller amounts (and put in cellophane bags as well)


So I made these tags to put on the bags of Reese's...super fast and EASY!


Here is how the "buckets" turned out...I ended up combining both "treats" into the same bucket....and I used one of my paper cutters to cut out some black contact paper and wrote the kids names on their buckets...I did 12 buckets for all the kids, and then 2 larger buckets for each of her teachers...

Now, let's hope it doesn't snow and school is cancelled!!  Fingers crossed!


Monday, February 11, 2013

UPDATE: Ugly Chair (again!)

Alright, well, another "failed" attempt, but this time I am just sticking to it.

Remember that chair that I had spray painted CHARTREUSE!?  Well, I had thought (briefly) about just leaving it that bright green color, but then I realized that every time I look at it, I want to vomit.  So, I was out at Lowe's a couple weeks ago, so I stopped by their spray paint aisle and scanned the colors until I got to the "greens"....I looked for the "most discrete" color I could find...because let's be honest...I needed discrete this time!

So I found a color (called Oregano, actually) and thought..."mine as well give it a try!"

We had a surprisingly warm day (once again), so I took the chair back out in the grass and sprayed it down. 

This is how it turned out...not "great", but it's a little more muted than the other color, so I am going to stick with it and just "leave it at that".  NO more spraying...I. AM. DONE.

Here it is...

This is the "BEFORE" picture in case you forgot...


And THIS, ladies and gentlemen, is the AFTER picture!!


 Which one do YOU like better??


Friday, February 8, 2013

A "Neu" Calendar

So, I found this neat little website that offers a new way to do calendars.  Instead of the traditional month-by-month, Sunday-Saturday calendars that we are all used to, NeuYear offers a different take.


In a 27"x39" poster, they lay out the entire year for you to view at once.  The weeks are arranged Monday through Sunday so that the weekends are all together.  AND, the cool thing is that the days just continue through the weeks with no breaks between months.  

Thus, when you want to record a week's vacation that overlaps two months, it's easy to see and do that.  


They offer two styles.  One that is dry erase and one that is plain paper.  We went with the plain paper version so that I don't accidentally erase my plans (and so that I can fit a lot in each box with a pencil point... dry erase markers are too thick).

My intent was to hang it on the door, but it seemed a bit big for that (though it did fit, technically).  So, we rearranged the office wall to fit the calendar.  But now it just looked like a poster on the wall... see the Command adhesive tabs?


I set out to make a frame.  But for cheap!  A wooden-frame poster frame cost $50+ everywhere I looked.  So, I went to the Restore and found three 6' strips of moulding for $3.15 (after tax).  :)

I used my little mitre box and saw and made a poster frame.  I sprayed it Heirloom White to match the other frames in the room.

Instead of buying a heavy backing, like plywood, I just bought foam sheets and glued the frame to the back.  I wanted it to be very lightweight on the wall, and I was simply sticking a poster to it.  So, here is the final product.  Now the calendar looks a bit nicer and should last through the year, rather than just taped to the wall where it can get bumped and have its corners torn.


I love the calendar.... just wish it came with boxes in a color other than turquoise.  :)  But I think we'll manage.


Wednesday, February 6, 2013

Valentine's Buckets

It's Valentines time again!  If you ever followed my old blog, Life Made Interesting, you may remember these Valentine Buckets.

Well, it was time to pull them out again on February 1.

Every morning, I put something new into the bucket.  Now, ideally, the kids would remove their goodies each day and leave the bucket empty.... but I suppose I should be glad the stuff isn't everywhere.  You can see who was happy to see the Cracker Jacks yesterday.  

In addition to adding a new goodie each day, I also occasionally put out a cute Valentine riddle.  

It's not much, but this is how we celebrate Valentines here.  A little something fun (ala Advent Calendar style).  

I know Target often offers these types of buckets in the dollar section.  And the goodies are usually simple... pencils, glowsticks, candy, post-it notes, etc.  On the last day, Valentine's Day, it's usually a little bigger... a pair of earrings for the girls, a yo-yo or foam plane for the boys.  You could even do something like a special cupcake on the 14th.  

I know we're already almost a week in, but you could always do this for a week leading up to V-Day.  :)


An Organized Teen Closet

So, Elfa and Rubbermaid and ClosetMaid have been around for quite some time now.  So.... why do builders still give us a simple shelf and rod when there are big closets in most new homes?

Case in point.... my son's bedroom.

This closet is 8.5 feet long.  Yes... a 102" long reach-in closet.  Granted more than half of the closet is hidden behind walls, not doors... but it's a lot of storage area.  So... why does he only have one shelf?  It was seriously under-utilized.  

Last week as I wandered around my 13 year old's bedroom, I realized he had a lot of things sitting around the room due to lack of storage space {aka shelves!}

I wanted to do something nice in his closet since he is at an age to respect most anything that goes into the room (i.e... no one using marker on it or placing stickers on every visible part).

We are on a tight budget these days, so a $400+ Elfa system was out of the question.  Even a $250 wooden tower system like this...

... which looks awesome... was still out of our budget range. 

So, I relied on the same ol' white wire systems I usually install.  This time I picked Rubbermaid's 4'-8' closet.  It had a lot of flexibility to the system.  Plus I could get it on Amazon for $95.  I also opened a new Amazon card account, which gave us $50 credit!  So, I paid $45 for the system.  MUCH better than $400+.

First, I painted his closet the same gorgeous navy blue that we have on his one bedroom wall... it was leftover paint.  Read:  $0!

I was a little concerned about putting a dark color in an small enclosed space without a light.  I even painted the ceiling!  Why not?  It's easier than taping off the ceiling.

I'm not sure my back and neck have recovered fully just yet.  Yeeeowch!  

Do you do this?  I cover my roller tray with Press-n-Seal to make for SUPER easy clean-up.  Just pull up the corners, grab the foam roller off the rod from underneath, ball up and toss.  Roller and tray... clean.

While the paint was drying, I removed the contents of the closet system box.

So, here's after coat #1.  Yep, I was still nervous about the dark color, but it was too late now!  So, I did one more coat of paint.

Then, I began installing the system.  I used a laser line to draw the line to install the HangTrack on.

Here, the standards are hung:

After the track and standards were hung, I began popping in the shelves.

It provided 22 feet of shelves and 10 feet of rod space.  Wow... what a change from 8'!
I added a few inspirational quotes to his closet doors.  They seemed like the perfect spot to be reminded of who he is and who he needs to be.... y'know, a door you open every day.

Here's the Bible Verse I chose:


And the reminder quote:


Also hanging on the left door is a ThirtyOne bag to hold "too small" clothes.  All of my kids have one of those in their closets.  Anytime they try on clothing that is too small, itchy, uncomfortable, etc... they are to put it in the bag.  (If they don't, those same too-small clothes somehow always end up in the laundry basket and Mom never learns that it's not being worn.)

All in all, we were able to remove all pants and shorts from the dressers.  (Which is GOOD... he's almost in a man's size... those bulky jeans practically take up a drawer on it's own!)  Those now have a shelf dedicated to each type of bottom.  

I put the shoe bin on the bottom shelf.  No more tripping over it at night.

Here's a shot to show how we're able to utilize the several feet to the left of the left door... it's  rod for dressy clothes and unused sports/guitar equipment.

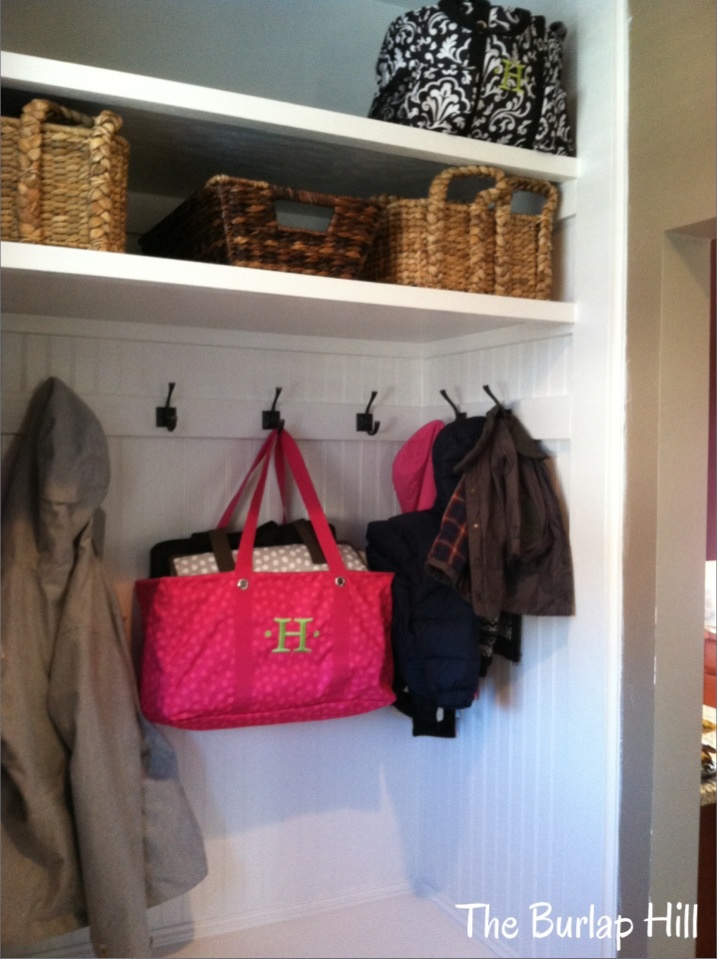
Here's the top shelf.  Ahhh... More Thirty One Storage bags to hold "too big" clothes.  All of the other bins in the closet (and the ThirtyOne bags) were already owned... we didn't buy anything new, other than the shelves.

I'm very excited to walk past his room these days.  I just grin when I see how organized and clean it looks!  Now... to see just how long it lasts!  Ha!
After looking at this photo, there is obviously a little untapped door space on the lower right.  Hmmm.... what could go there?  A painted chalkboard area (it's already nicely shaped)?  A hook to hold extra bags or hats?  A whiteboard?  A poster?  A framed photo?  Oh, the possibilities!

Even Lucy loves Ben's new ORGANIZED room... especially the beanbag chair near the door.